
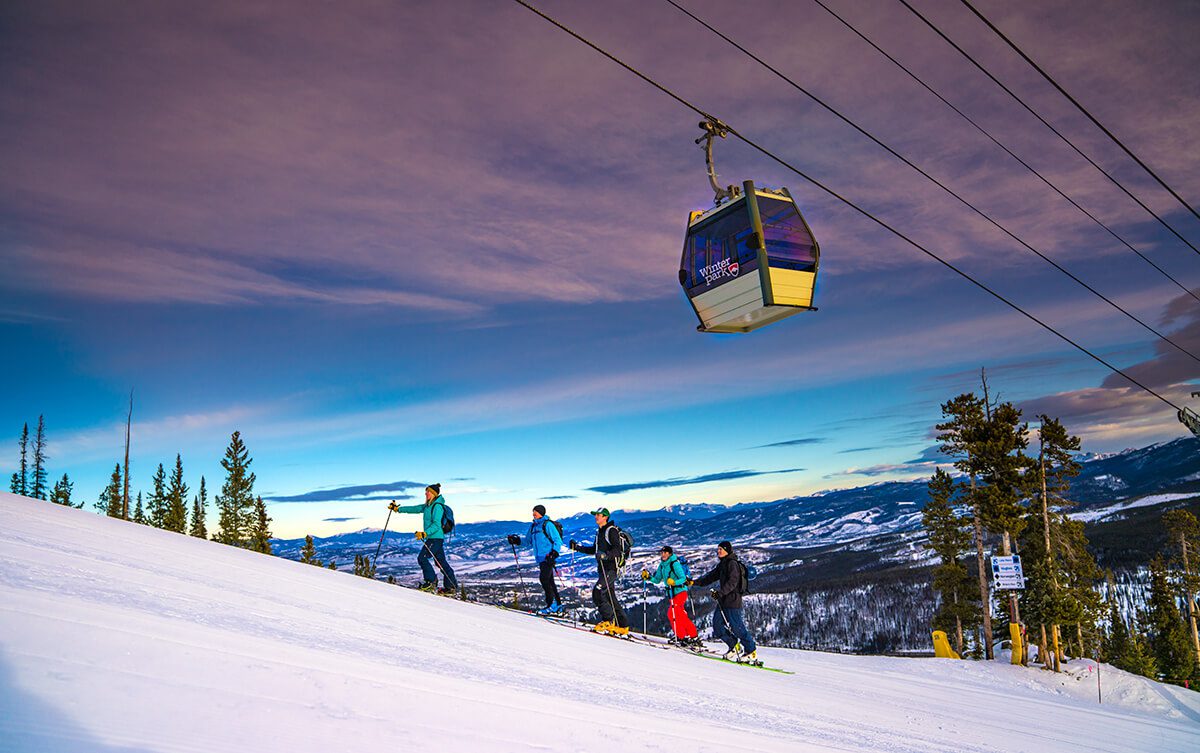
At Winter Park, going uphill can be just as good as going down, sometimes better! Keep reading for a quick guide to getting into uphill, and check out our Intro To Uphill for a guided experience to get you started!
Winter Park local, Meaghan O’Hara, is no stranger to the rewards the uphill can bring. She can often be spotted well before lifts start turning, and well after they stop for the day, sliding one ski in front of the other on her way to the top. So we figured, no better person to give you an uphill guide than Meaghan.
Step One: Look Good!
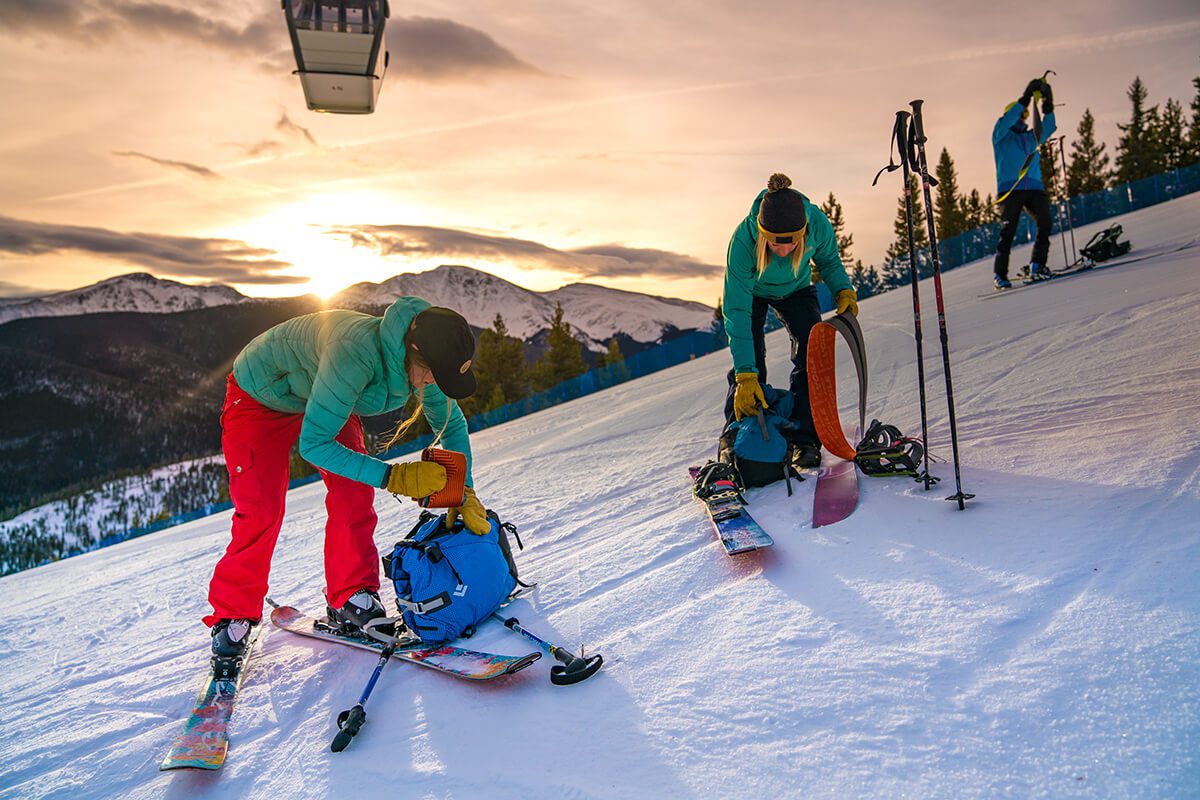
“The first step toward enjoying the climb? The gear. The right skis, boots, bindings, poles, and clothing can be the difference between making it to the top in time for sunrise, or turning around halfway up due to blisters and panting.”
Let’s start with your skis!
“My personal preference for resort skinning is a lighter, skinnier pair. The weight doesn’t drag you down, and you don’t need to be worried about sinking too deep on these runs that have been groomed within the last 24 hours. But just as I have my personal preference, I’m sure you also have yours. The real key to success here is to use a pair you love, you’re comfortable in, and you’re not afraid to try something new with.”
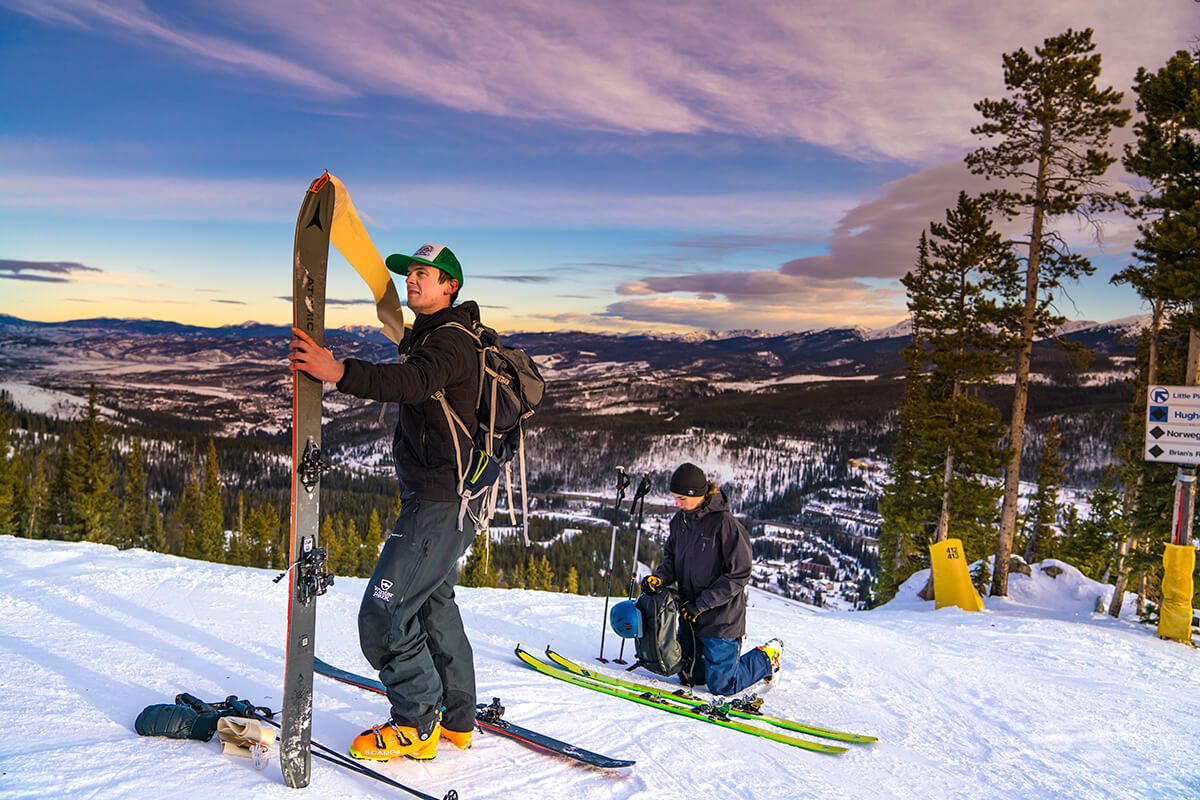
Don’t forget your skins…
“You won’t get very far without ’em. Actually, you won’t really get anywhere at all. I typically come with my skis prepped and my skins already on, laying smooth down the length of my ski and clipped at either end. When I reach the top, I try to remove those suckers in one smooth motion, and then I pack them in their case first thing. They’re important to me so I treat them with care. Always, always fold them glue to glue.”
Add your bindings…
“Your number one goal – the heel must release. We’ll get more “techy” from here on, but if your heel releases, at least you’re off to the right start. Binding options include telemark, AT, or tech (pin bindings). AT bindings work with your standard Alpine boots, but they tend to be a little heavier; whereas tech bindings are great if you want to feel lighter on the snow and are okay searching for a specific boot that jives.”
“Your number two goal – risers. They’ll make your uphill life so much easier. When climbing, you want your heel to stay perpendicular to the slope. It creates less energy needed on your part, a quicker and easier propel forward, and just a more enjoyable experience all around. Look for risers that have 2 or 3 height settings, and pop those bad boys up to the right one before you get going.”
Find comfortable boots
If you’ve ever skied in an old boot that’s the wrong size, you know this lesson well. It doesn’t matter if you’re skiing uphill, downhill, sideways, or backwards. You need to find a ski that’s comfortable for you.
For uphilling specifically, you have three options:
- Tele Boots – naturally more flexible, allowing bend and flex as your foot bends to climb
- Alpine Boots – can be switched into “walk mode”, giving you a similar flexibility going uphill, but a sturdier, more locked-in feel going down.
- Tech Boots – tend to be a little softer in general, but don’t forget that these need to pair specifically with those pin bindings I mentioned above.
Add your accessories… poles and clothes.
For poles, adjustable ones are ideal. Lengthen them as you go up, and shorten them when you go down. It’s that simple.
For clothing, layers are your best homies. You’ll be warm hiking up and cold skiing down. I always start in my moisture-wicking shirt and have my full on ski coat in my backpack. I also rep two pairs of gloves (light and heavy), shades AND goggles, and a dry hat along with my helmet.
Step Two: Feel Good!
It’s time to get in that mountain-climbing state of mind. My favorite way to do this? I always try to remember why I’m out here in the first place. I mean, if I’m about to hike the side of a mountain at 5 am instead of catch a 9 am luxury chair, I better have a reason why.
My biggest reason is the rewards, both long-term and short-term. Uphilling is one of the most rewarding experiences I regularly take part in on the mountain, hands down. I work my booty off getting up that mountain, so that when I cruise back down, I earned those damn turns. I use this as a workout to get my entire body in shape for the summer. And I gather groups of friends to do the same, because it’s the best way to bond.

Step Three: Find the Best Runs
Let’s talk about the best run choice, since I know that’s why you’re here anyway. Keep in mind that this is NOT an all-inclusive list, but these are my go-to’s.
On the Winter Park side, start out with a green option by starting on Parkway, moving to Village Way, and ending at the top of the Prospector Lift. When you’re up for a little more of a challenge, start at Larry Sale, hit Cranmer, and end at the beautiful Sunspot. Or, if you’re really ready to take on our mountain (think black diamond of the uphill world), start on Lower Hughes, visit Little Pierre, skin Upper Hughes, and end at Sunspot.
On the Mary Jane side, I have a green, blue and black option as well. For you green circle lovers, go up Corona Way to Edelweiss. For you squares, visit the classic Mary Jane trail and finish with the Olympia lift. And for you black diamond experts, hit Sleeper to Sidetrack or Rollins Way.
Step Four: Before You Go, Know the Rules
If you don’t read any other section of this blog, read this one! Safety is always a top priority. You can access the full uphill safety guide here. To take advantage of uphill skiing at Winter Park Resort, you must review the rules and purchase a season arm band for $25. Proceeds go to Grand Country Search and Rescue; a critical resource for uphill skiers.
When I’m heading up, my number one safety concern is snow cats, snowmobiles, and other skiers. The quickest way to stay away from all three is simply to stick to the side of the trail and to avoid trails that are being actively groomed altogether. This is a resort rule when you’re skiing during times that the mountain is open for downhill, but it’s also a personal rule I follow each and every time I hit the mountain, no matter the time of day. I also bring a headlight for visibility, and never ever stop under rollers where I’m not visible to folks above me.
My secondary concern is avalanche control. Skiing up at a resort is much less concerning than in the back country for this exact reason, but that doesn’t mean avalanches (controlled or uncontrolled) can’t still occur in bounds. Especially during morning and evenings. I never uphill in any areas patrol may be doing control work, which includes places like The Cirque, Pano, or Trestle. And I never ski alone or without the necessary equipment in potential avalanche zones. When it comes to avi safety, avoid anything questionable.
My final concern is accidental harm I may cause myself. When the lifts aren’t turning, patrol isn’t around to help anyone out. If I ski out of control and get hurt, it’s my poor friends who will be dragging me down the mountain. And if I work my gear too hard and something breaks, it’s my own self who will be making the long, downhill walk back to the car.
Step Five: Learn the Tricks of the Trade
I’ve been uphilling for years now, and I’ve learned a thing or two on the slopes of WP. Here goes:
- Avoid trails with moguls going uphill. They’re not nearly as fun to climb as they are to bump down. Instead, pick a flat or groomed trail near a mogul run, and cut to the side on your downhill.
- Plan your route. There’s nothing worse than getting stuck on a pitch that’s too steep for your ability. So know your skill level, plan accordingly, and don’t be ashamed to start nice and easy. Just because you ski blacks going down, does not automatically mean you’re able to climb one.
- Stand up straight, and keep your weight centered over your bindings. It’s a tough lesson to learn that takes a decent amount of practice since it’s not your body’s initial instinct. But it really does help.
- Don’t panic if you start to slide backwards – it happens. Remember your basics, and combat that slide with an old-fashioned PIZZA!
Step Six: Become One of the Crazies
I know you’ve gazed on from a chairlift before thinking “What is that person thinking? They’re going the wrong way!” I’d be lying if I told you I didn’t think that myself a time or two. But when I reach the top, my labored breathing slows, my legs burn satisfactorily, and as I turn to see an empty mountain and hear the sweet sound of silence, I remember why I do it. I become one of the crazies. And I try to turn everyone I meet into one as well.